Utilizing Python scraping, AWS Lambda, and AWS S3 for website content delivery
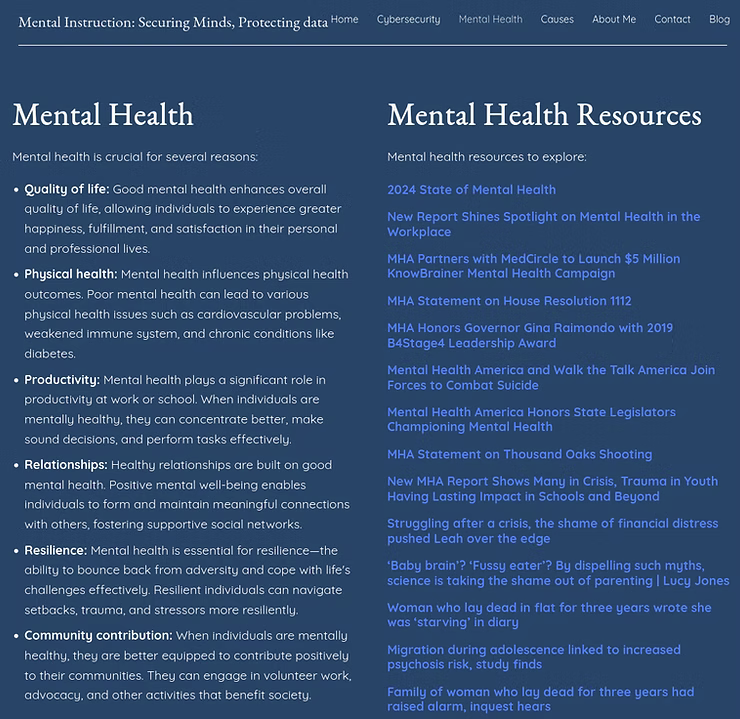
Cyberhands.tech started earlier this year for various reasons: develop some HTML, CSS, and JS, provide a platform from beginning to end, provide a voice on IT/Cybersecurity and Mental Health content, and finally, to tie some infrastructure, web, and Cloud technologies together to further supplement the various Linux + Cloud certifications achieved this year. Surprisingly, this turned into a more enjoyable project than expected, which yielded the "Mental Health Resources" content of the page below in a dynamic fashion to refresh the links weekly through Python scraping. This blog post will detail the steps to tie the technologies in the blog title together.
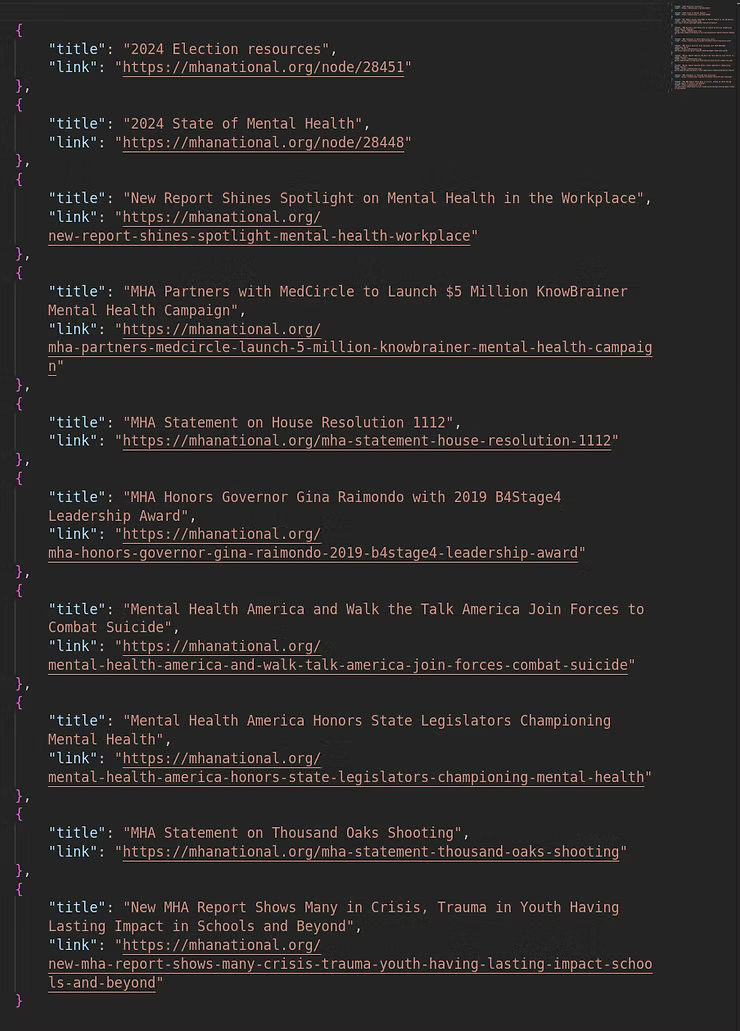
Below is the beginning Python script from a local Linux development machine. The programmatic logic of the script scrapes website RSS feeds based on the keywords in the "keywords=" section of the script. In theory, it allows a developer to easily add or update the content of the website content. When run on a local Linux development machine it outputs the scraped content to a "mental_health_links_test.json" file in the same directory as where it was originally executed.
import feedparser
import json

# List of RSS feed URLs
rss_feeds = [
    'www.website.com',
    'www.website.com',
    'www.website.com',
    'www.website.com',
    'www.website.com'
]

# Keywords to filter articles
keywords = ['suicide', 'suicidal ideation', 'depression', 'mental health', 'anxiety']

def fetch_feed_entries(feed_url):
    feed = feedparser.parse(feed_url)
    return feed.entries

def filter_entries_by_keywords(entries, keywords):
    filtered_entries = []
    for entry in entries:
        if any(keyword.lower() in (entry.title + entry.summary).lower() for keyword in keywords):
            filtered_entries.append(entry)
    return filtered_entries

def main():
    all_entries = []
    for feed_url in rss_feeds:
        entries = fetch_feed_entries(feed_url)
        filtered_entries = filter_entries_by_keywords(entries, keywords)
        all_entries.extend(filtered_entries)

    # Prepare the data for JSON
    json_data = []
    for entry in all_entries:
        json_data.append({
            'title': entry.title,
            'link': entry.link,
        })

    # Save the data to a JSON file
    with open('mental_health_links_test.json', 'w') as json_file:
        json.dump(json_data, json_file, indent=4)

if __name__ == "__main__":
    main()
In this context, the actual website in the first screenshot does not match the "mental_health_links_test.json" due to different run times, which reinforces that the "2024 Election Resources " will appear after the AWS Lambda job runs on schedule.
Once local development was achieved with the Python script and the "mental_health_links_test.json" output resulted in actionable data for deployment, the time came to implement a Cloud Networking and Infrastructure Solution for an agnostic, programmatic solution rather than running on a local Linux development machine. While there are many Cloud Service Providers (CSPs), AWS was the environment of choice to enhance the solution.
Following a "Best Practices" approach, AWS training and certifications preach the validity of the Principle of Least Privilege (PoLP) without overtly stating as such. Focusing on Identity and Access Management (IAM) Users, Roles, and Policies, the overall understanding and expectation is there is an Administrator or Root account, much as there is in a Windows or Linux environment, and rather than using those accounts a more restrictive account is created for day to day tasks. IAM Users, IAM Roles, and IAM Policies loosely equate to Active Directory (AD) Users, AD Groups, and AD Group Policy Objects or Access Control Lists (ACLs). There are a few superfluous differences within AWS, but overall the previous example is a good approximation for individuals new to AWS.
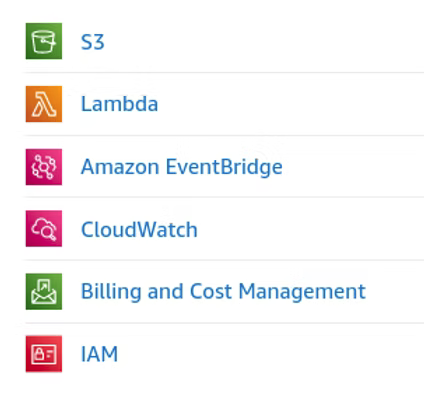
The Python scraping script to tie this into a Cloud Networking and Infrastructure Solution involves Simple Storage Service (S3), Lambda, Amazon EventBridge, CloudWatch, and IAM.
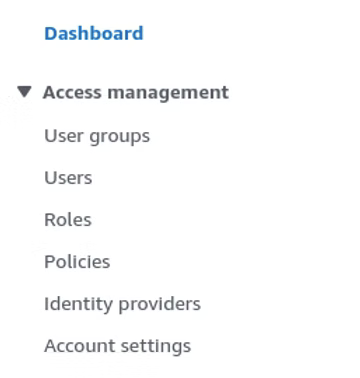
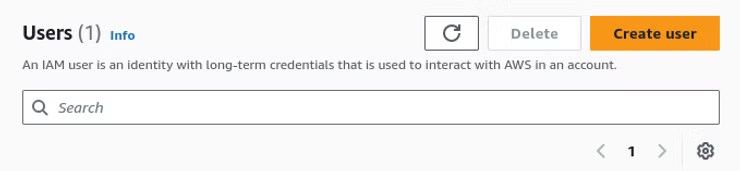
Creating a new user in AWS is relatively simple. Once logged in as the Root user, the Administrator can browse to the IAM Dashboard, and under Access management, click the Users category.
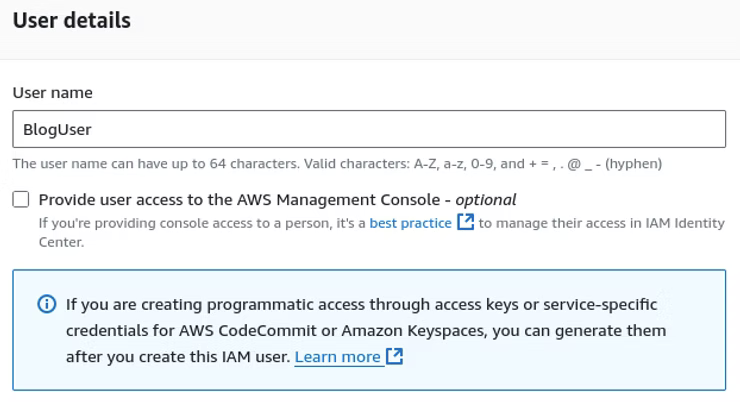
Click Create user.
Specify required details for the user account creation such as Name, console access, and an Auto-generated password or Custom password and click Next.
On the Permissions options, the default is to "Add user to group." For the purposes of this solution, "Attach policies directly" allows the Administrator to apply policies directly. In the interest of this Cloud Networking and Infrastructure Solution, add AmazonEventBridgeFullAccess, Amazons3FullAccess, AWSLambda_FullAccess, CloudWatchFullAccess, CloudWatchLogsFullAccess, and IAMFullAccess.

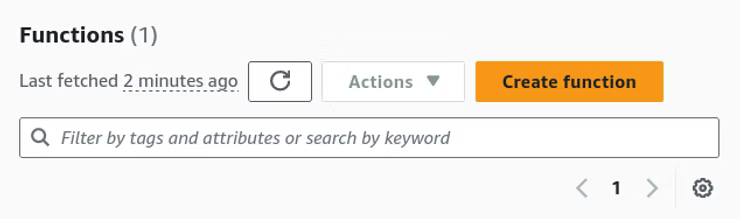
Once the user is provisioned and logged into the AWS console, navigate to Lambda and click Create Function.
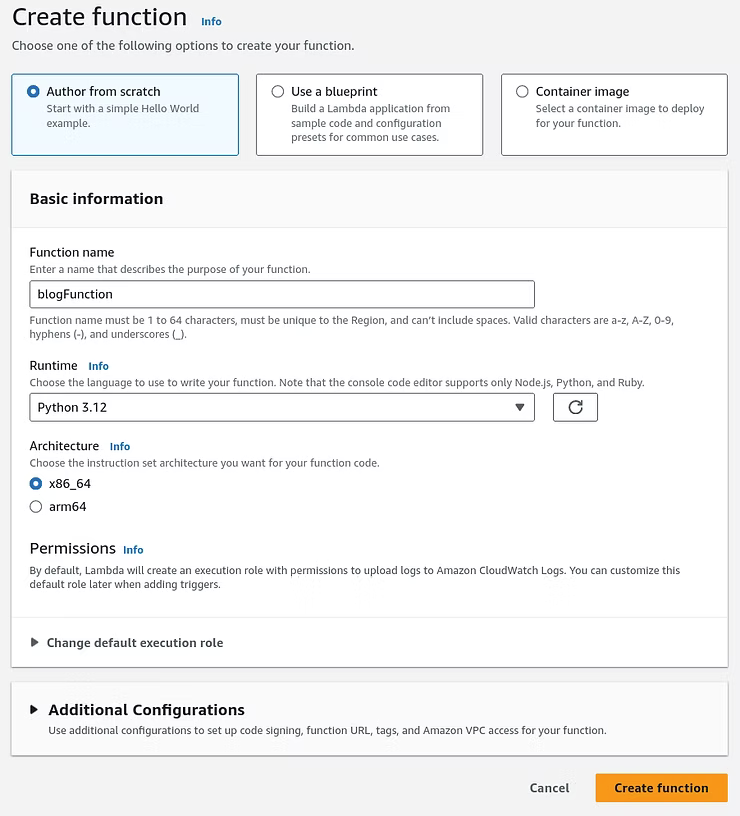
In the Create function menu "Author from scratch", a Function name, Runtime of Python 3.xx, and the default settings should suffice to create the function.
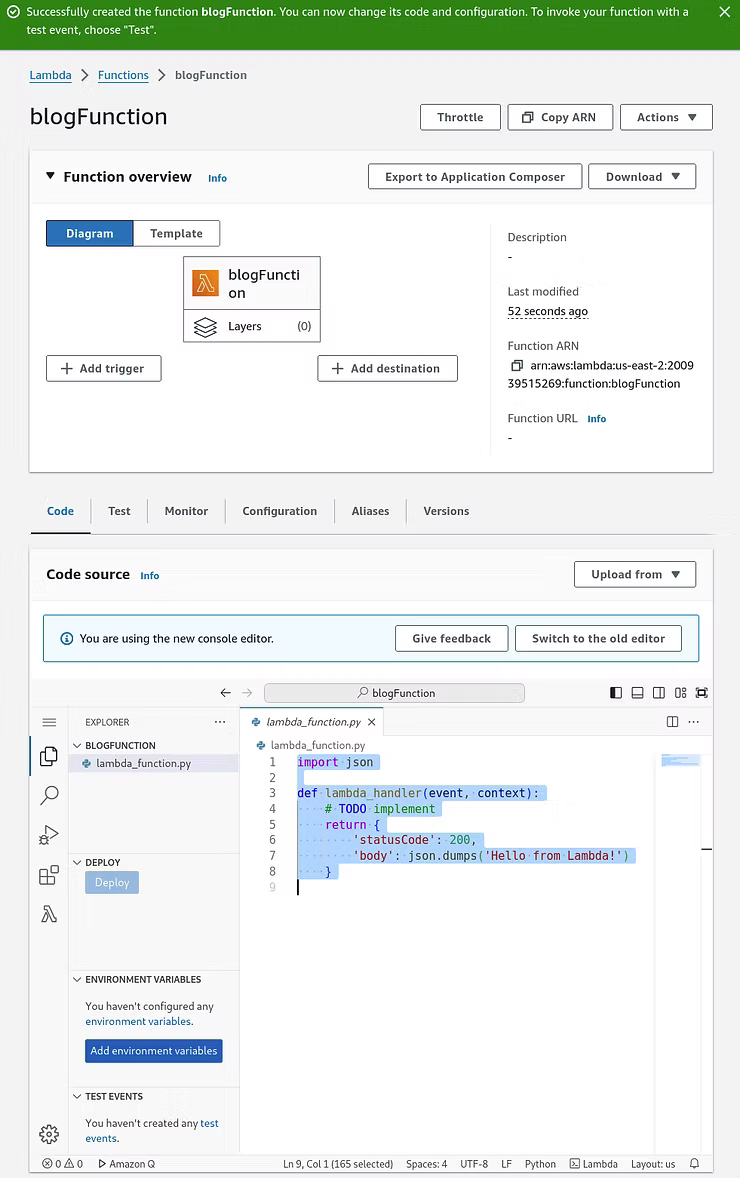
Once the function is successfully created, the code and configuration can be changed.
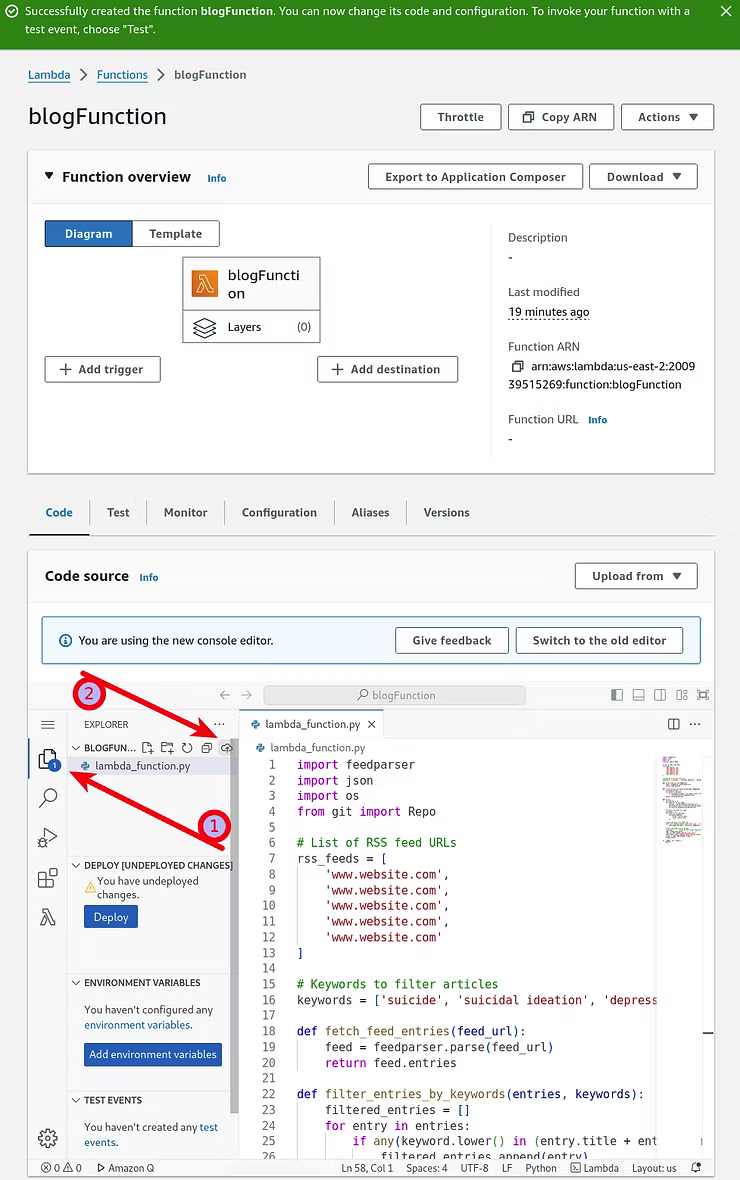
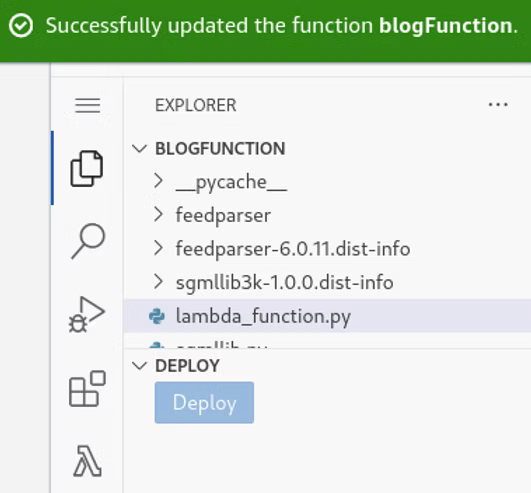
For the purposes of understanding, the Python script developed on the local Linux development machine can be pasted into the new function. The left-side Explorer window will update with a "You have undeployed changes" message. Clicking the Explorer window will reveal another sub-menu with a "Deploy code to Cloud" icon to save the addition.
With the code deployed, the Test tab provides a function to test the code.

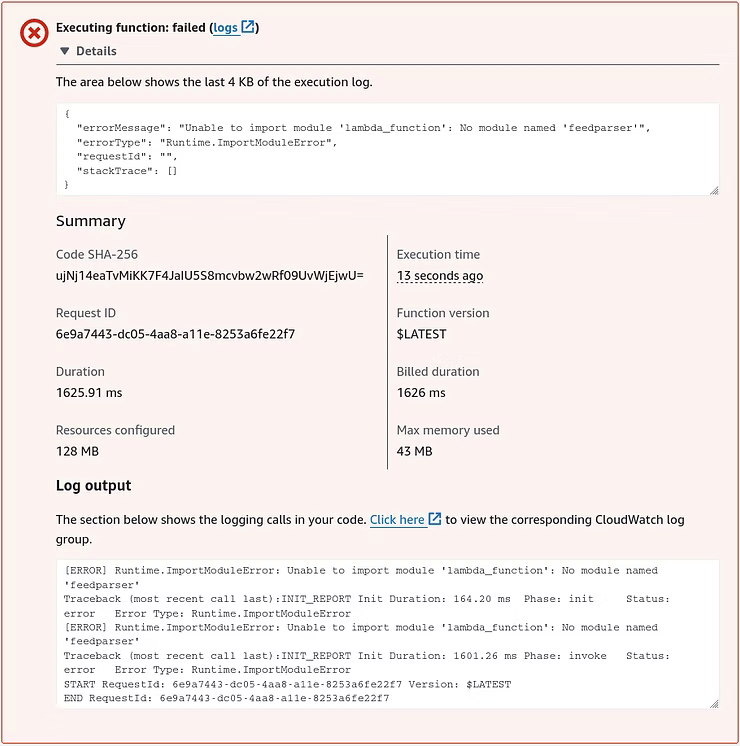
Testing the deployed code fails with errors of "No module named: 'feedparser'", which is related to Lambda not having the required dependencies installed. AWS Lambda does not include preinstalled third-party libraries in a deployment package, such as 'feedparser'.
To fix this, 'feedpasrser' and any other external modules that need to be added to a deployment package can be uploaded to AWS Lambda. From the local Linux development machine the external modules can be installed locally and compressed into a zip file to be uploaded to AWS. With the developed Python script in a directory of its own, the command "pip install feedparser -t ." will install the required library and dependencies.
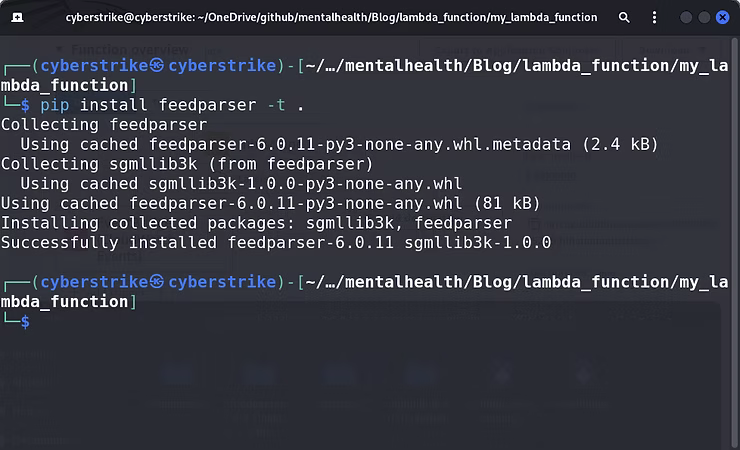
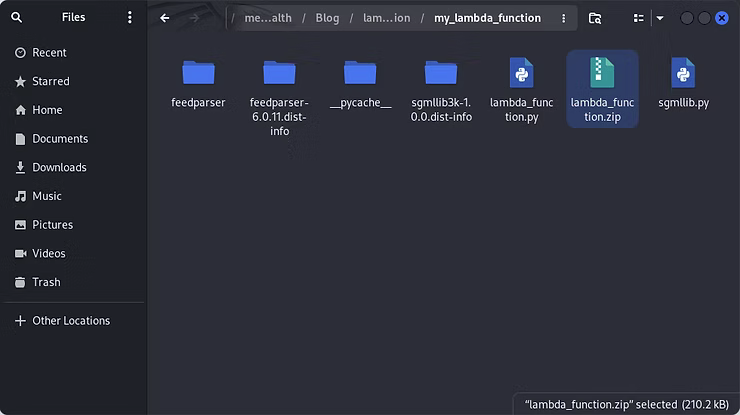
When the directory structure is prepared with the Python script, library, and the necessary dependencies, the structure should look something like this:
my_lambda_function/
├── lambda_function.py  # Your Python script
└── feedparser/         # feedparser library directory
The evolution of the Python scraping script requires a further import and configuration to programmatically scrape output to the "mental_health_links_test.json" to a file system. Boto3, AWS's Software Development Kit (SDK) for Python, provides an interface to interact with AWS services, such as AWS S3. Ideally, as this Python scraping idea grew to fruition, the final hurdle is where to save the "mental_health_links_test.json", which will enable it to load content through a web page in a dynamic manner. Below is the script re-written to utilize Boto3 to run in an AWS Lambda environment to save to an S3 bucket.
import feedparser
import json
import boto3	# AWS SDK for Python

# List of RSS feed URLs
rss_feeds = [
    'www.website.com',
    'www.website.com',
    'www.website.com',
    'www.website.com',
    'www.website.com'
]

# Keywords to filter articles
keywords = ['suicide', 'suicidal ideation', 'depression', 'mental health', 'anxiety', 'PTSD', 'self-harm', 'narcisism']

def fetch_feed_entries(feed_url):
    feed = feedparser.parse(feed_url)
    return feed.entries

def filter_entries_by_keywords(entries, keywords):
    filtered_entries = []
    for entry in entries:
        if any(keyword.lower() in (entry.title + entry.summary).lower() for keyword in keywords):
            filtered_entries.append(entry)
    return filtered_entries

def lambda_handler(event, context):
    all_entries = []
    for feed_url in rss_feeds:
        entries = fetch_feed_entries(feed_url)
        filtered_entries = filter_entries_by_keywords(entries, keywords)
        all_entries.extend(filtered_entries)

    # Prepare the data for JSON
    json_data = []
    for entry in all_entries:
        json_data.append({
            'title': entry.title,
            'link': entry.link,
        })

    # Save the data to a JSON file in /tmp (Lambda's writable directory)
    json_file_path = '/tmp/mental_health_links_test.json'
    with open(json_file_path, 'w') as json_file:
        json.dump(json_data, json_file, indent=4)

    # Upload the JSON file to S3
    s3 = boto3.client('s3')
    s3_bucket_name = 'platinumit-mental-health-links-test'  # Replace with your S3 bucket name
    s3.upload_file(json_file_path, s3_bucket_name, 'mental_health_links_test.json')

    return {
        'statusCode': 200,
        'body': json.dumps('Mental health links updated successfully.')
    }
Once the script is updated, from the directory structure with the Python script, library, and dependencies, the command "zip -r lambda_function.zip ." will zip the contents of the folder, not the folder itself, to create a file called "lambda_function.zip" with the Python script and "feedparser" library.
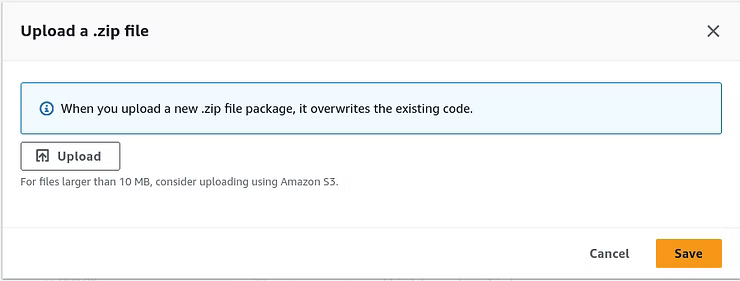
With the zip file created, within the AWS Lambda Console function, choose Upload from and select .zip file.

A new window pops up where Upload can be clicked.
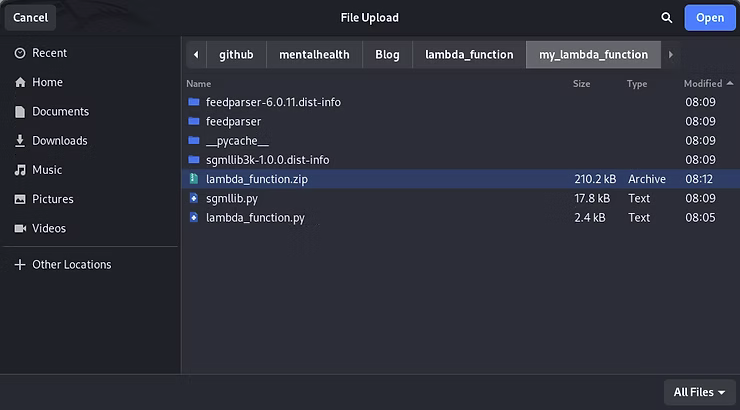
The lambda_function.zip can be chosen.
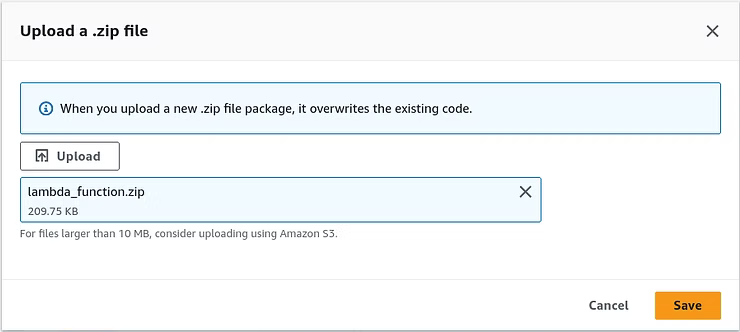
Which can then be saved by clicking Save to overwrite the previous code, which will overcome the missing dependencies.
Once successfully updated, the Explorer displays the contents of the uploaded zip file.
Once deployed another test can be performed that reveals another error message, which indicates the Lambda functions exceeded the default 3-second timeout.
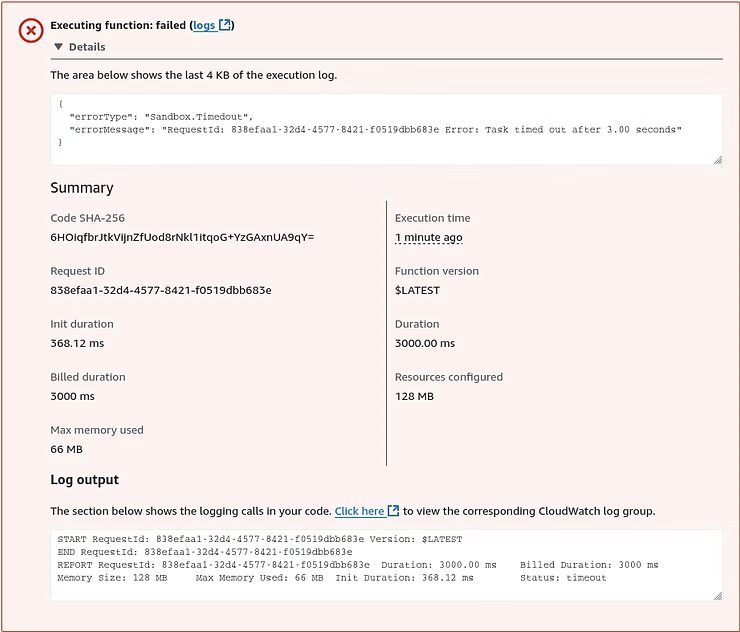
By default, the timeout of 3 seconds for AWS Lambda functions is to balance the cost and performance of cost efficiency, performance and resource management, and common use cases. Amazon AWS Lambda includes a free tier of 1 million free requests per month and 400,000 GB-seconds of compute time per month. Build and scale as needed to remain in the free tier. For testing purposes, the default settings can be changed by going to Configuration and Edit.
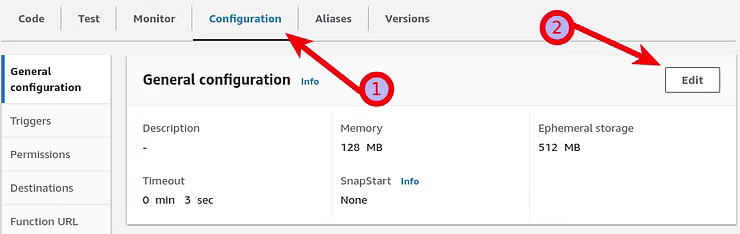
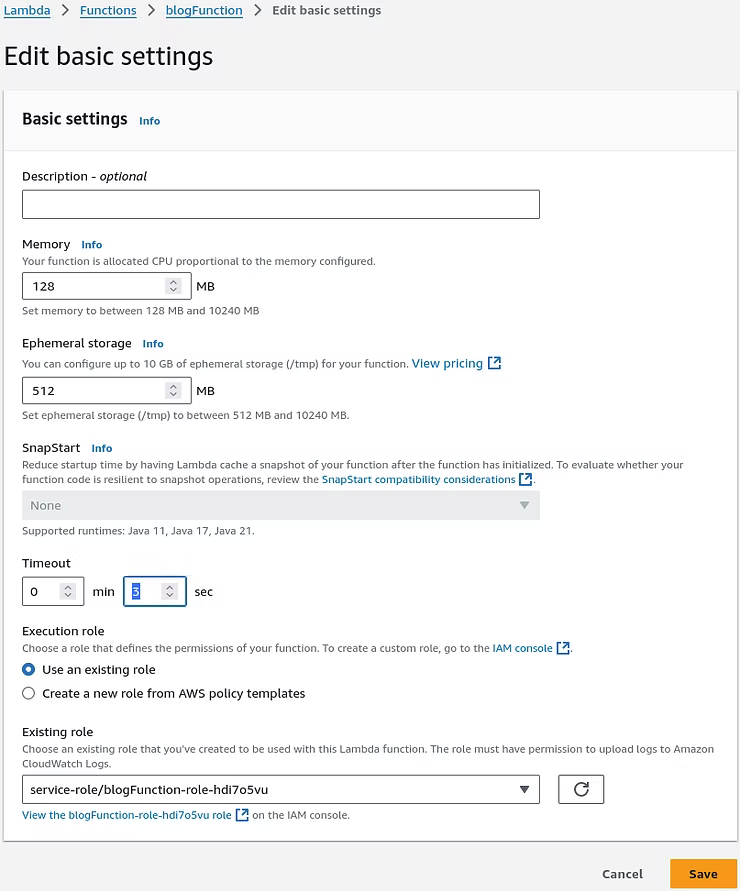
As can be seen in the Edit basic settings 3 seconds is the default. In the interest of testing, modify it to a higher value of 3 minutes to test the function and observe the results.
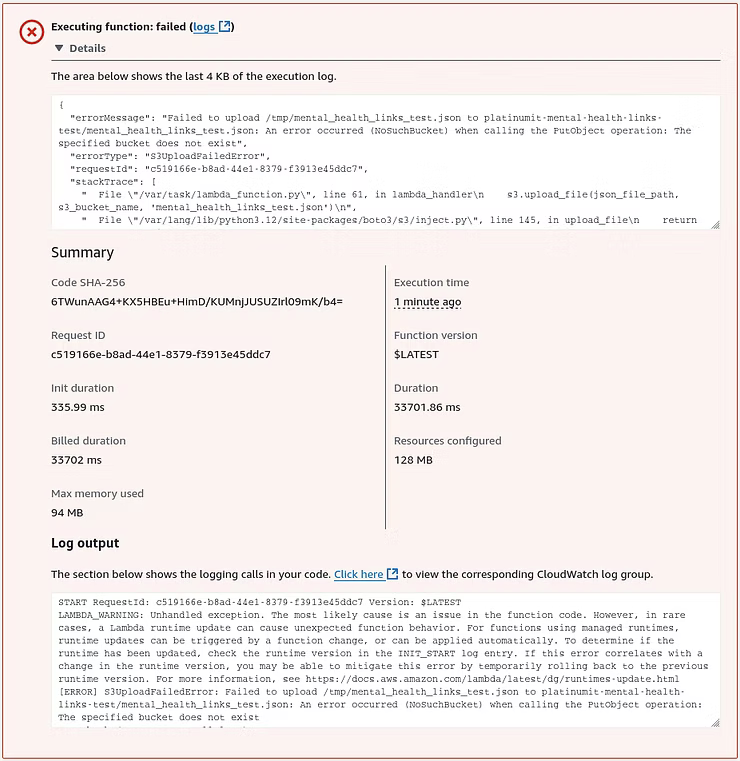
Testing the function again, now that the default timeout is changed, results in a new error message indicating the job ran correctly to the point of trying to store the "mental_health_links_test.json" file, due to an Amazon S3 bucket not existing to store the file.
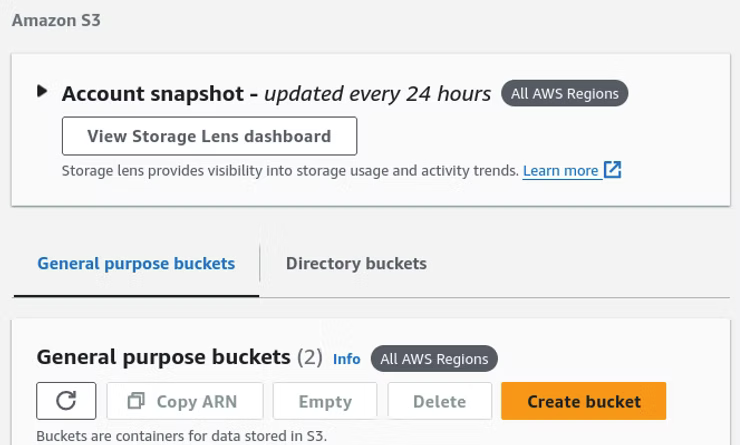
At this point of the process, an AWS S3 bucket must be created to store the "mental_health_links_test.json" file. Amazon AWS S3 free tier offers 5 GB of standard storage, 20,000 Get requests, 2,000 PUT, COPY, POST, or LIST requests, and 15 GB of data transfers out of all Amazon S3 services, not just S3. Once Amazon S3 is opened, click Create Bucket.
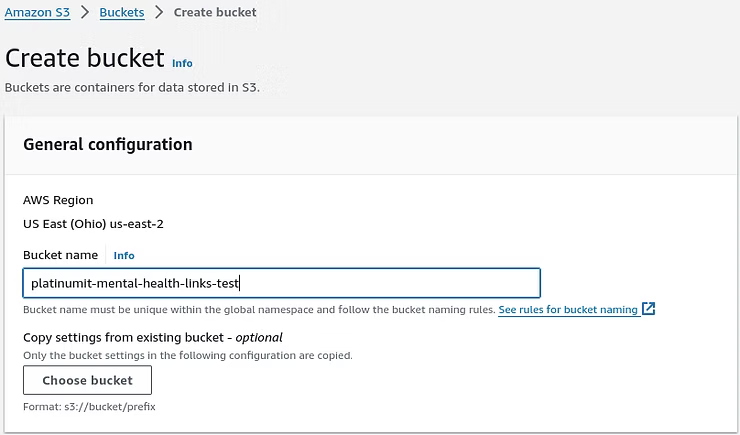
When creating an AWS S3 bucket under General configuration a name in lower case letters and the default settings suffice.
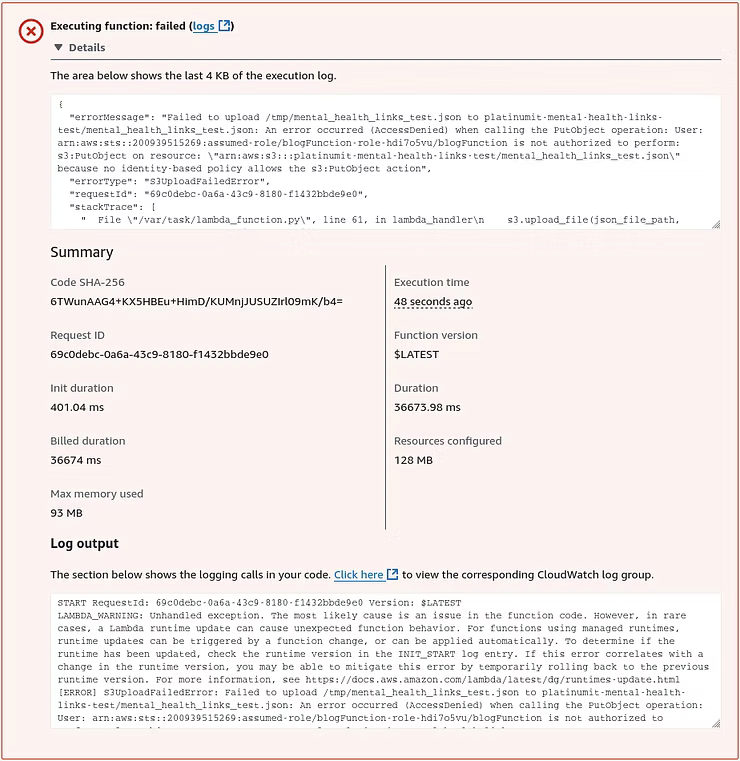
With the bucket now created, another test reveals an error message indicating insufficient permissions to upload the file using the s3:PutObject action to the new S3 bucket, platinumit-mental-health-links-test.
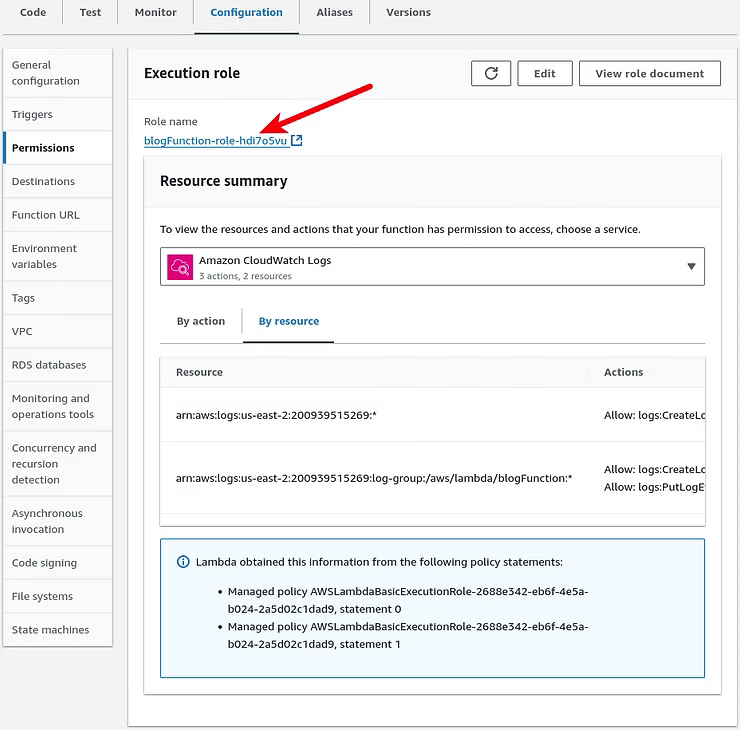
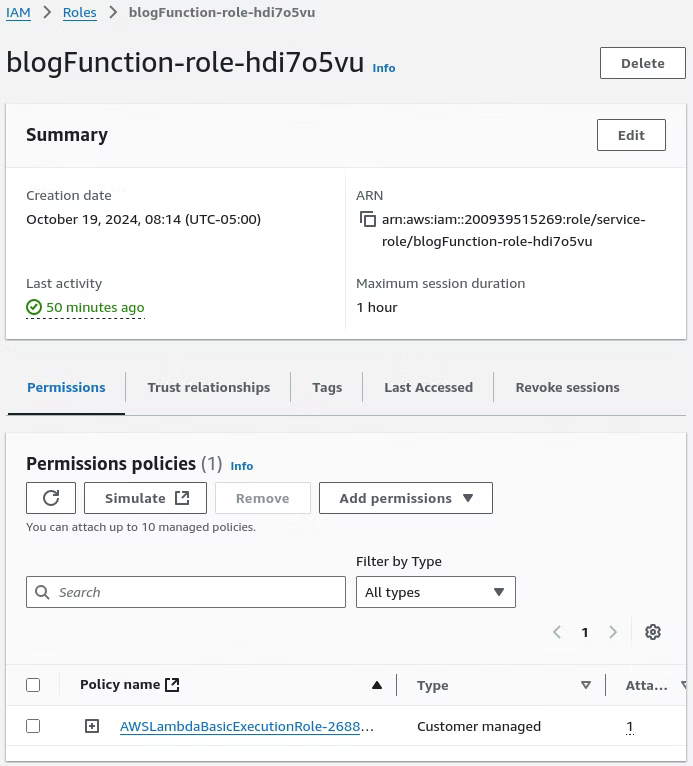
To resolve this issue, the IAM Policy for the Lambda Role must be updated to allow the s3:PutObject action on the new bucket platinumit-mental-health-links-test. In this instance, the IAM Role, shown in the screenshot below, is not the same as the user account logged in with to create the Lambda function. To find the Lamdba Role user, in the Lambda function open the Configuration, Permissions, Execution role page, such as shown in the screenshot, and clicking the link under Role name of the Lambda function name.
In the Lambda function IAM Role permissions, click Add permissions.
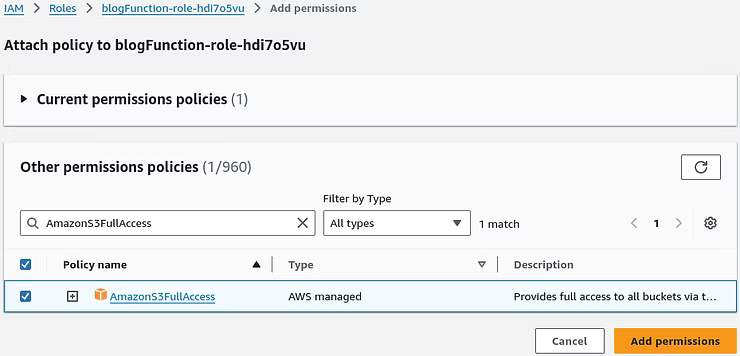
To attach policies search for the AmazonS3FullAccess policy and click Add permissions.
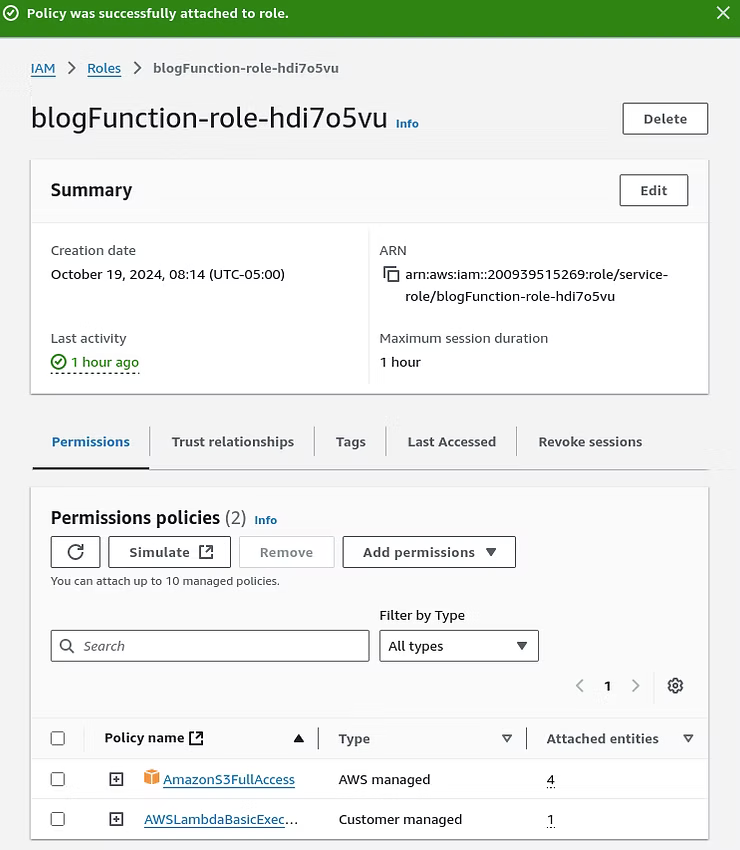
The result shows the updated Lambda function IAM Role permissions.
When testing the Lambda function now, the result are a success with a status code of 200, which is a common HTTP status code indicating the request was successful.

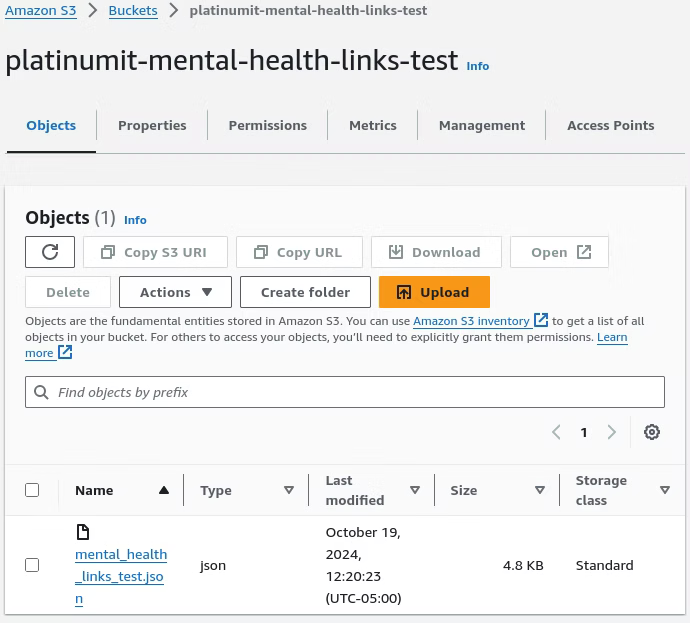
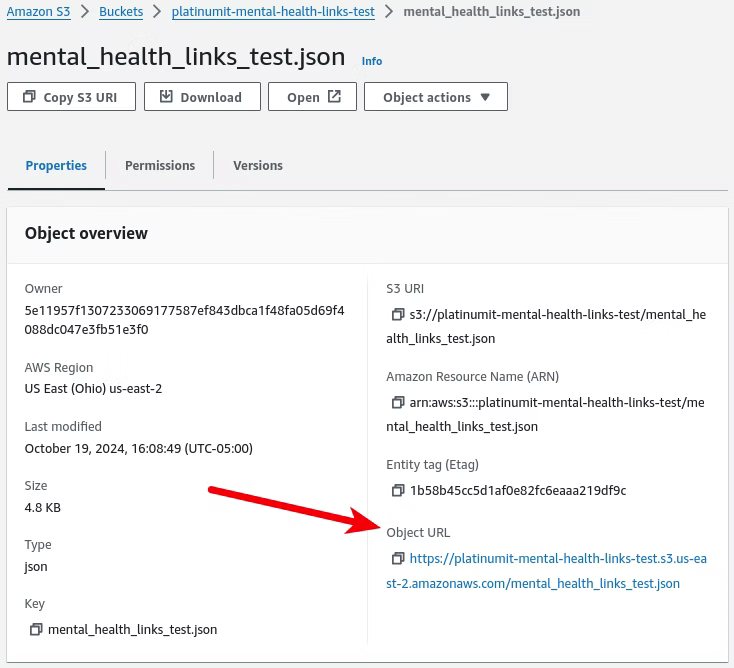
Moving to the S3 tier to view the bucket shows a successful s3:PutObject action with the "mental_health_links_test.json" file now present.
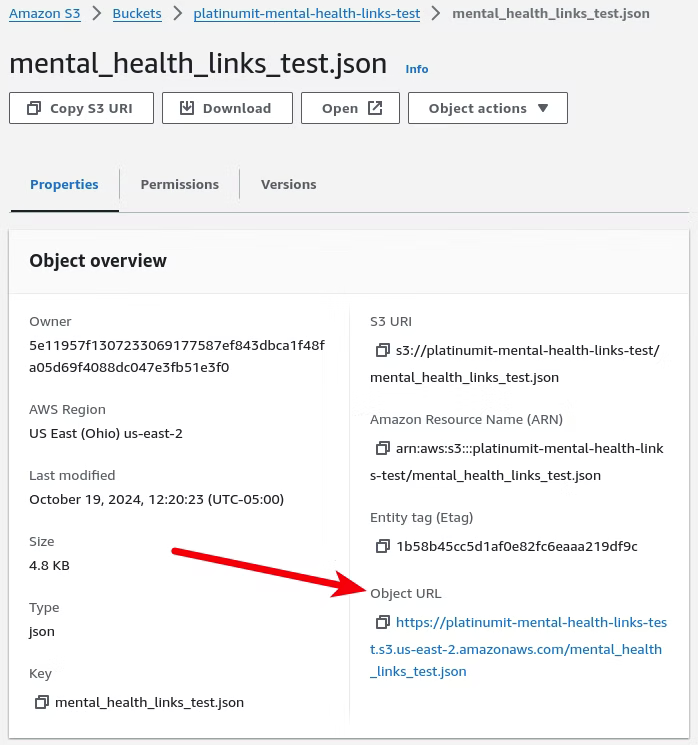
However, Clicking the "mental_health_links_test.json" file in the bucket shows the Object URL, which should be where the scraped data resides.
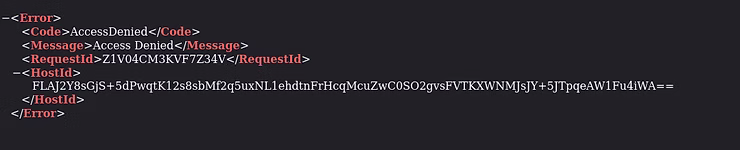
Instead of the scraped data, clicking the Object URL reveals an AccessDenied message in XML format, indicating another permissions issue.
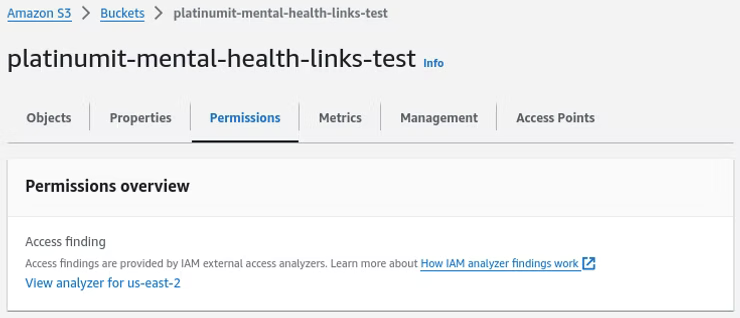
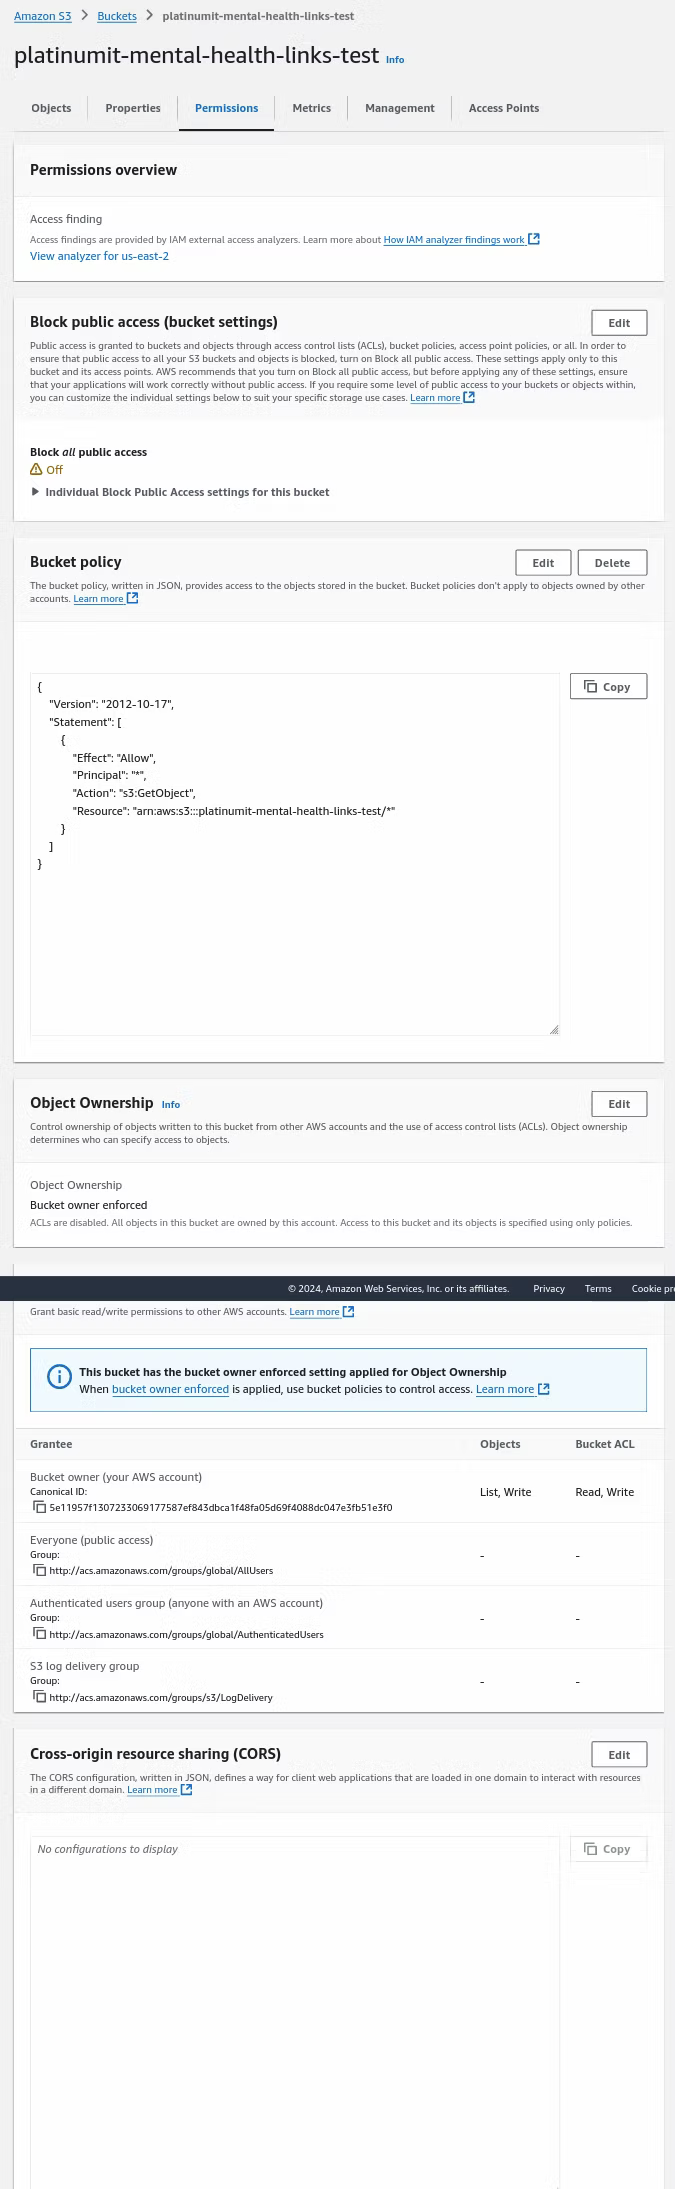
At this point, the final leg of the journey of storing the Python scraped data is the Bucket's permissions' settings at S3, Buckets, our bucket name, in this case platinumit-mental-health-links-test, and finally the Permissions tab as seen below.
More than one setting will be changed on the Permissions tab, such as Block public access (bucket settings), Bucket policy, and Cross-origin resource sharing (CORS). Under Bucket public access (bucket settings), click the Edit button.

By default, Block all public access is checked. Removing the check mark out of Block all public access results in all the sub-items being unchecked to match the screenshot below. Once done, click Save changes.

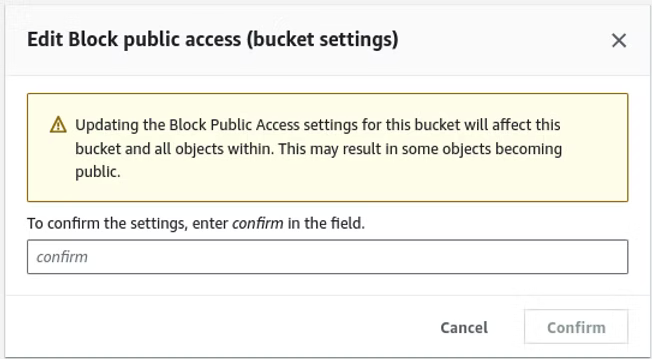
Changing the Block public access prompts an AWS prompt to confirm awareness of the changes. Enter the confirmation in the field and click Confirm.
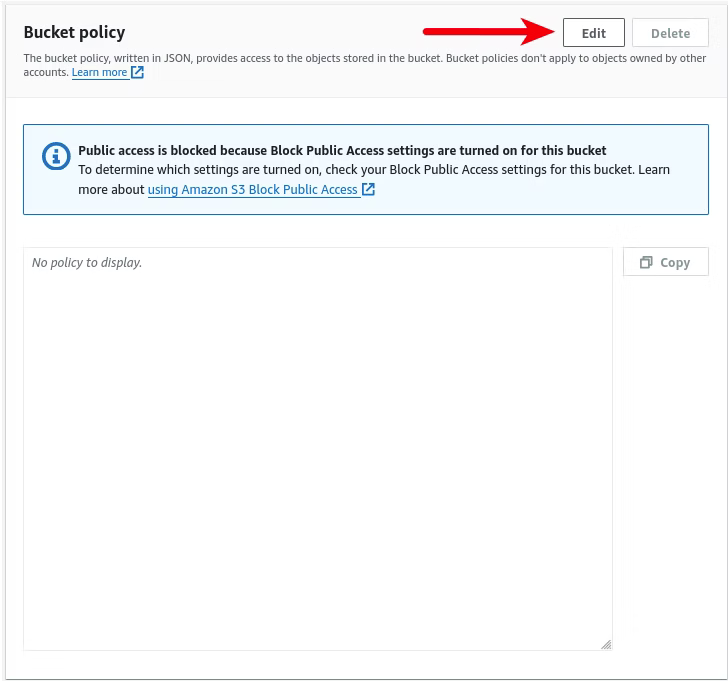
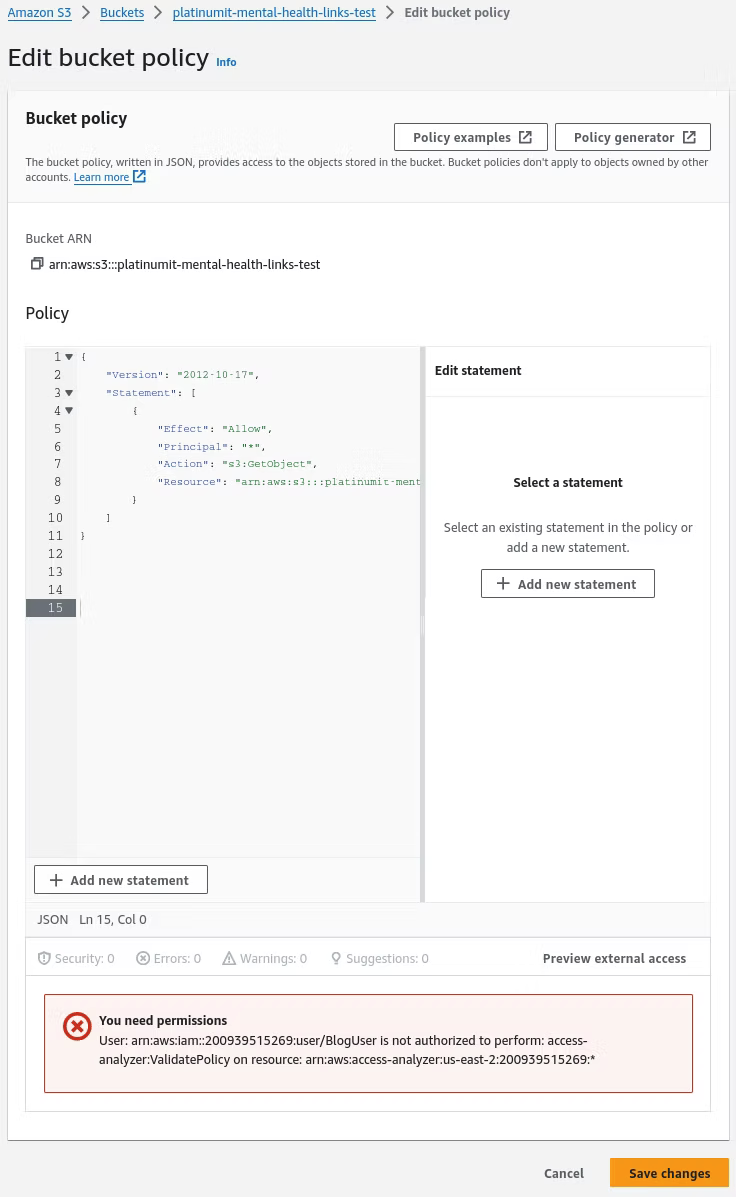
Under Bucket policy, where no policy exists, click the Edit button.
Editing the bucket policy requires adding a new statement, as is shown in the screenshot below by clicking Add new statement.
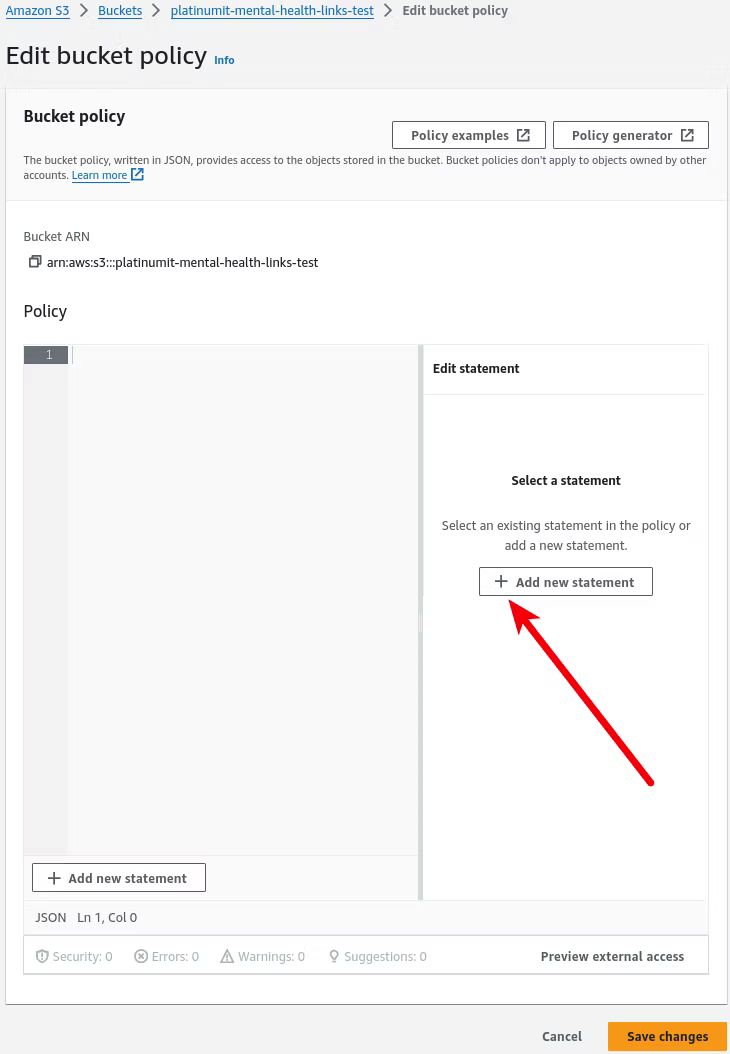
When adding the statement, the default populated template outlines steps to help create a policy, which in this case can be deleted.
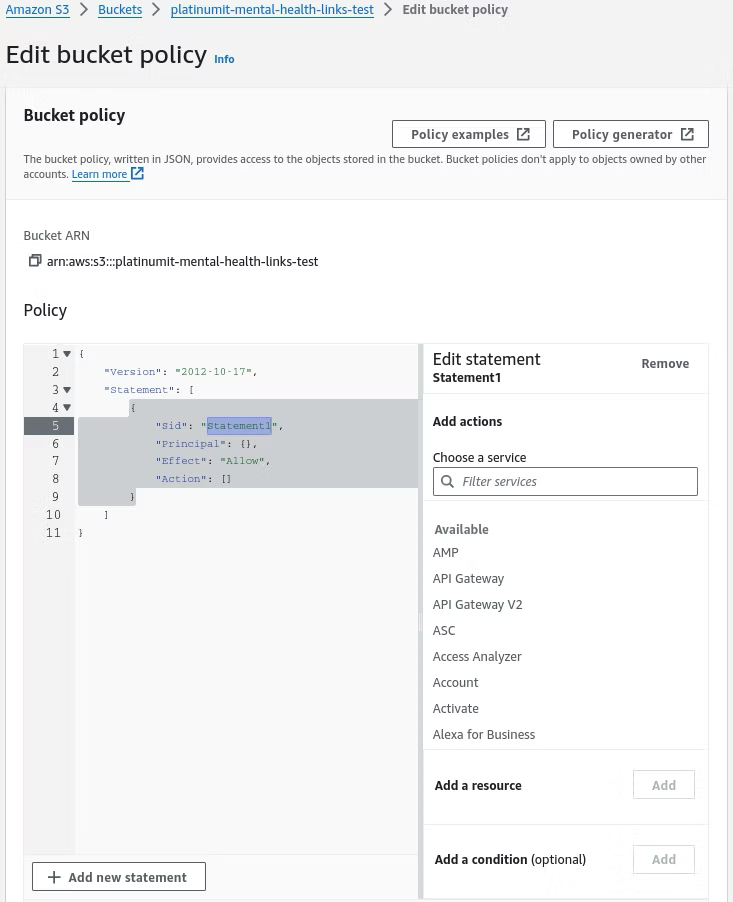
To be replaced with the statement below. Note to match the bucket to match. For this blog, the "platinumit-mental-health-links-test" bucket would have to match the implemented bucket name.
{
    "Version": "2012-10-17",
    "Statement": [
        {
            "Effect": "Allow",
            "Principal": "*",
            "Action": "s3:GetObject",
            "Resource": "arn:aws:s3:::platinumit-mental-health-links-test/*"
        }
    ]
}
Once the statement is entered, the Save changes button can be implemented.
Moving back to the Lambda function to test results in a true successful status code of 200.

With the successful status code of 200, moving into the defined bucket where the Lamda function is saving the "platinumit-mental-health-links-test" file the Object URL can be clicked.
Which, if everything in this guide was followed, will download the "platinumit-mental-health-links-test" file.
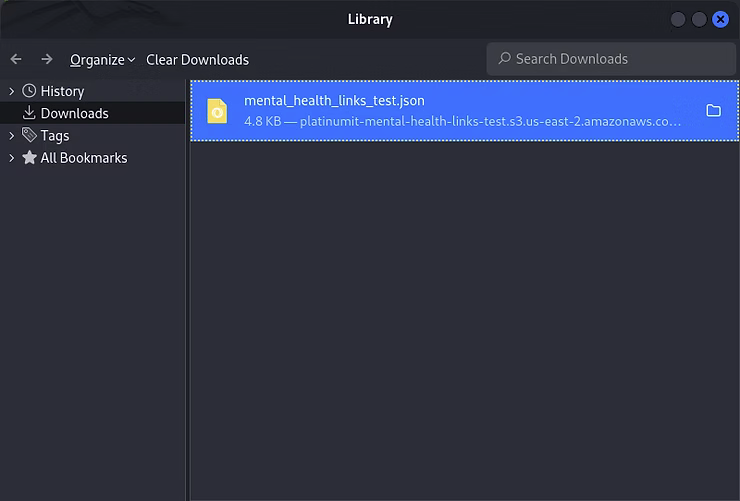
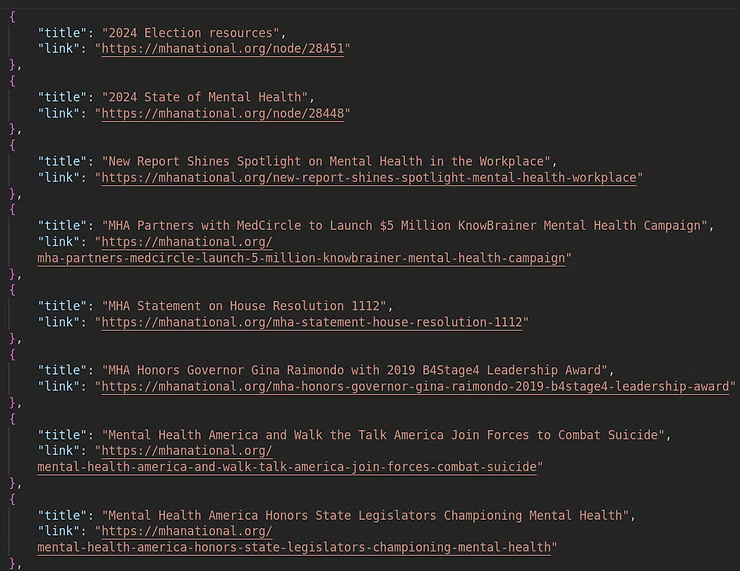
Opening the "platinumit-mental-health-links-test" file will reveal the scraped Python data.
Once the Lambda service with Python scraping script and the S3 bucket are functional, operationally it has to be defined to run on a schedule. Microsoft Windows uses Task Scheduler, while Linux uses Cron jobs. This is where Amazon's AWS EventBridge serverless event bus service enters to enable applications to connect using events, allowing real-time data from different sources to trigger actions or workflows across AWS services, custom applications, or Software-as-a-Service (SaaS) providers. AWS EventBridge includes 1 million events per month up to 100,000 custom events per month, with 5 rules per custom event bus per month.
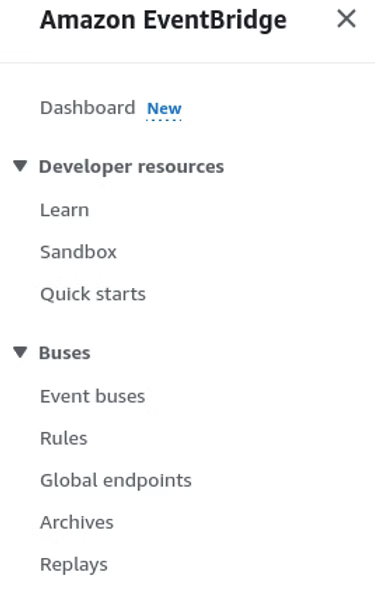
Locate Amazon EventBridge by searching for the service. Once open, under Buses click Rules and then click Create rule.
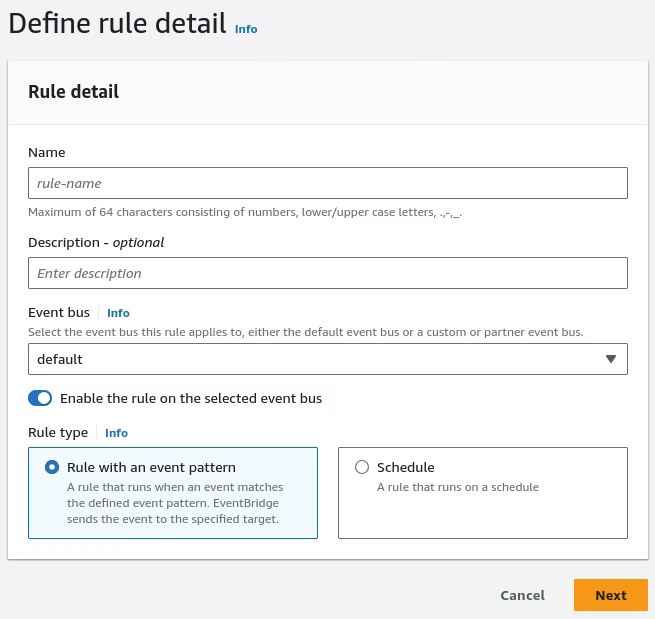
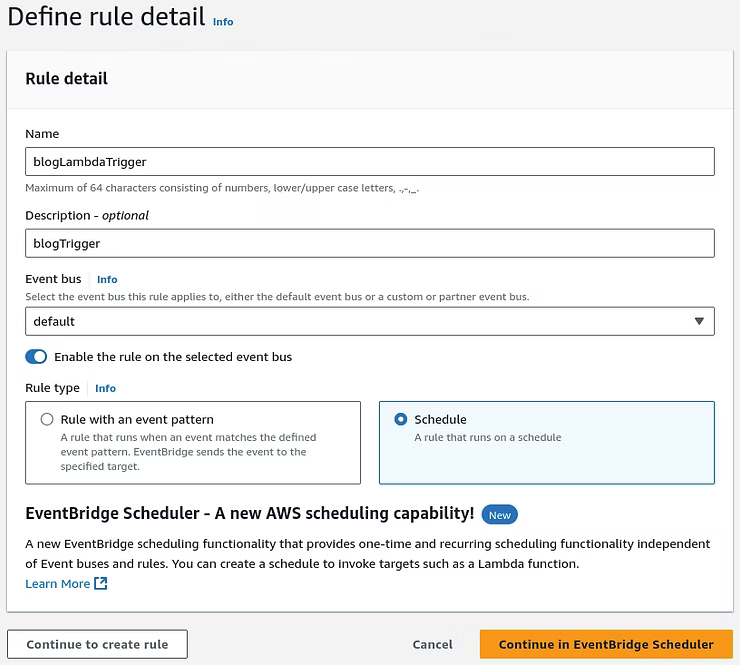
Defining the rule detail require a name, optional description, and either a Rule with an event pattern or a Schedule.
With the details entered, the Schedule option will be selected to enable the Lambda job to run on a determined scheduled. Click Continue in EventBridge Scheduler.
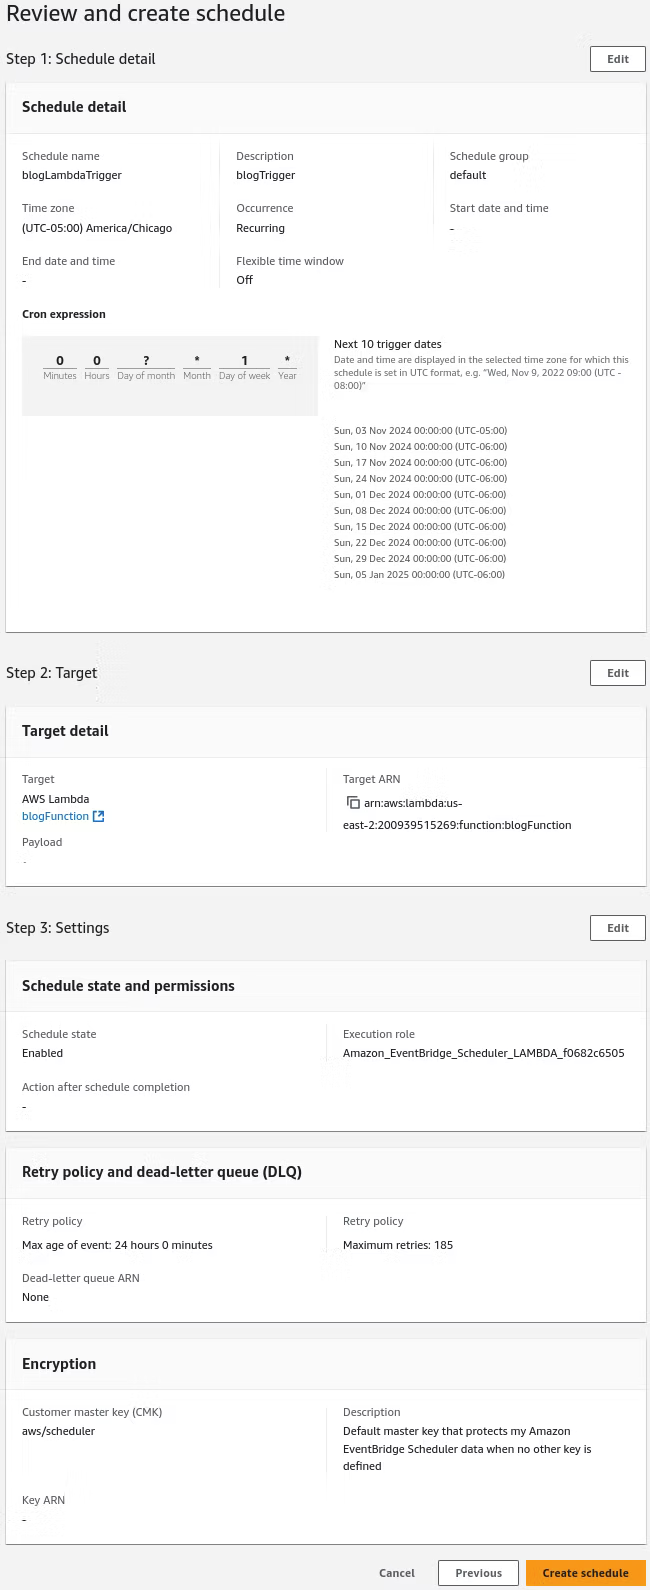
Specifying the schedule detail, in this instance, requires a Recurring schedule that is Cron-based, which translates to Linux on the backend. Flexible time window provides a window of when the schedule can be run, which for this example can be off. A desired schedule that would be midnight of every week translates to:
cron(0 0 ? * 1 *)
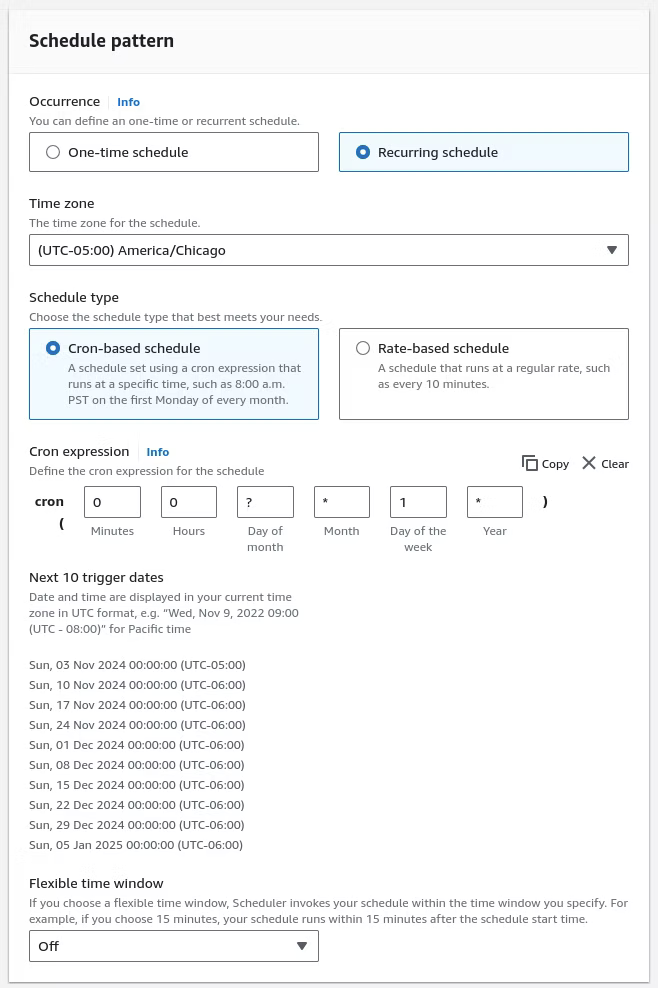
A breakdown of the Cron expression translates to:
0 0: Fires at 00:00 (midnight)
?: Day of the month is irrelevant (used for weekly schedules)
*: Every month
1: Sunday (where 1 = Sunday, 2 = Monday, etc.)
*: Every year
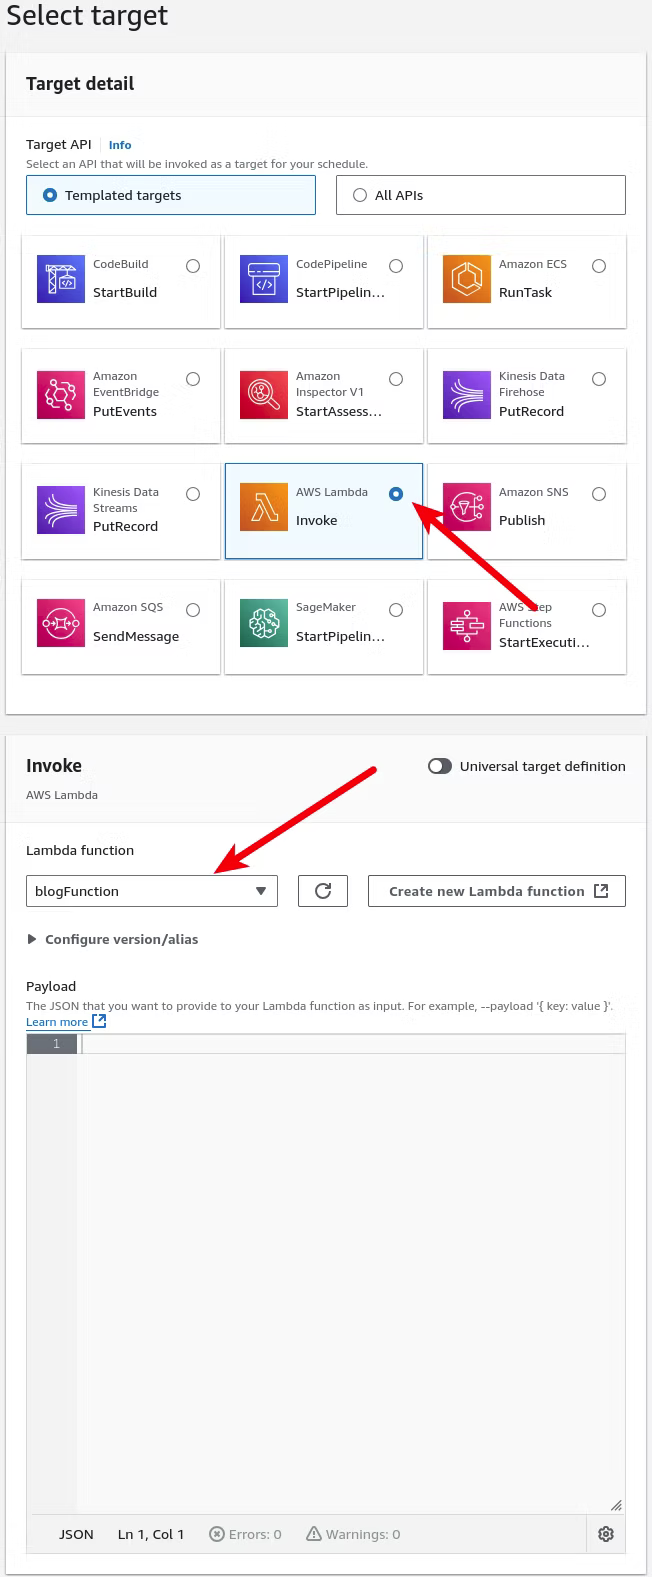
With the schedule defined, click Next which brings it to the target to select, which in this case will be AWS Lambda and selecting the Lambda function created earlier. Once defined select Next.
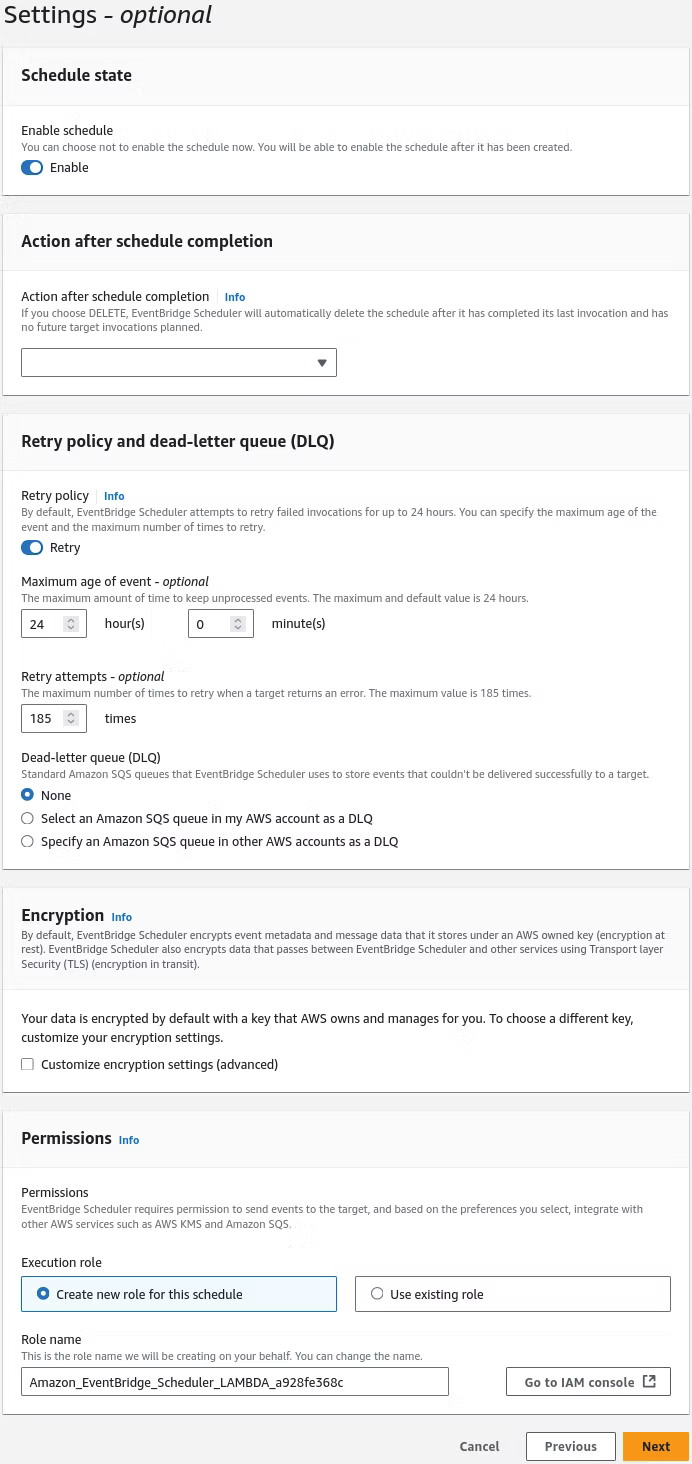
Optional settings can be left to the default settings and Next can be clicked.
Finally the Review and create schedule presents the finalized details of the job. Create schedule can be click to enable the job.
With Lambda and EventBridge readied, reviewing the publicly available S3 bucket, which should look similar to below, allows the development of the process to move forward.
https://<bucket-name>.s3.<region>.amazonaws.com/platinumit-mental-health-links-test.json
The scraped Python data is in a bucket configuration that allows storage and, due to the current configuration, retrievable information of the "platinumit-mental-health-links-test" file. Originally, the purpose of this blog post is to use Python to scrape the data in a job stored and executed by a schedule in AWS EventBridge and Lambda. The executed Python job saves the JSON file in AWS S3. Once stored, a way to retrieve and deliver the content is necessary to display the information. Below is the basic structure of an asynchronous JavaScript to fetch JSON data from an S3 bucket and display it on a webpage.
<script>
  async function fetchResources() {
    try {
      const response = await fetch('https://<bucket-name>.s3.<region>.amazonaws.com/platinumit-mental-health-links-test.json');
      const data = await response.json();

      // Target the div where you want to display the content
      const container = document.getElementById('mental-health-resources');

      // Create HTML structure for each resource
      data.forEach(resource => {
        const resourceElement = document.createElement('div');
        resourceElement.innerHTML = `<h3>${resource.title}</h3><a href="${resource.link}" target="_blank">Read more</a>`;
        container.appendChild(resourceElement);
      });
    } catch (error) {
      console.error('Error fetching mental health resources:', error);
      document.getElementById('mental-health-resources').textContent = 'Unable to load resources.';
    }
  }

  // Call the function on page load
  window.onload = fetchResources;
</script>
However, implementing the above code directly will lead to a Cross-Origin Resource Sharing (CORS) issue due to the fact the AWS S3 bucket does not have permissions to allow a request from a different domain than to the one that is serving the webpage. If we implement it directly without allowing CORS, the result will be a "Unable to load resources" error, as displayed below.

Cross-Origin Resource Sharing, or CORS, is a security feature where browsers enforce the "same-origin policy", so that the webpage is restricted from making HTTP requests to a different domain than the one it is operating from. In this case, cyberhands.tech cannot directly request data from https://platinumit-mental-health-links-test.s3.us-east-2.amazonaws.com/mental_health_links_test.json without additional permissions. CORS is the solution to enable servers to allow some or all requests from other origins, allowing responses of specific headers specified by browser requests.
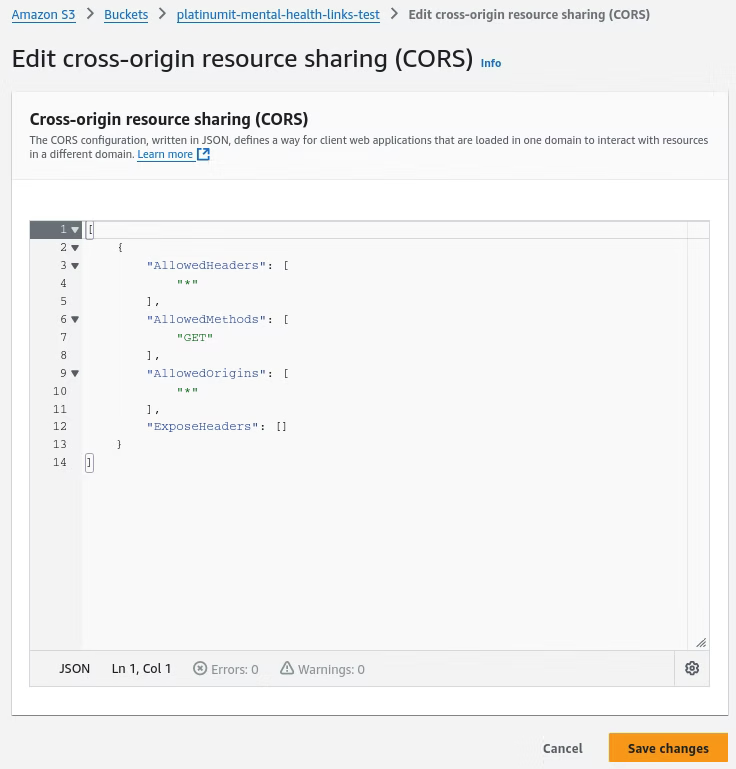
To enable CORS on the S3 bucket, go to Amazon S3, Buckets, and then the named bucket as displayed in the screenshot. The default tab is the Objects tab. At the bottom of the Permissions tab is where the CORS configuration resides. Click the Edit button to modify the CORS configuration.
Below is a example of the JSON to past to enable the CORS configuration. AllowedHeaders defines the HTTP headers that the server accepts from the client, or in this case the browser or application. AllowedMethods specifies the HTTP methods, in this case GET, to retrieve the resources of the JSON file. AllowedOrigins lists the domains the request can originate from. A "*" would allow any domain to request the resource. Specifying the exact website, i.e., cyberhands.tech, limits it in scope to enhance security. ExposeHeaders controls which headers are exposed to the client when accessing resources.
[
    {
        "AllowedHeaders": ["*"],
        "AllowedMethods": ["GET"],
        "AllowedOrigins": ["*"],
        "ExposeHeaders": []
    }
]
Enter in the CORS configuration information and click Save changes.
With the AWS S3 CORS configuration set, it would now be time to implement the HTML. Below is minimalist version of the necessary HTML, which is beyond the scope of this post, that retrieves the "platinumit-mental-health-links-test" file through the "async function loadMentalHealthLinks()" function to provide the reader a guide in retrieving the scraped Python data.
<!DOCTYPE html>
<html lang="en">
<head>
    <meta charset="UTF-8">
    <meta name="viewport" content="width=device-width, initial-scale=1.0">
    <title>Mental Health and Resources</title>
    <style>
        body {
            font-family: Arial, sans-serif;
            background-color: #1d4368;
            color: #f7f5f0;
            margin: 0;
            padding: 20px;
        }

        /* Center the main content */
        .container {
            max-width: 800px;
            margin: auto;
        }

        /* Headings */
        h1 {
            font-size: 2em;
            color: #f7f5f0;
            text-align: center;
        }

        /* Link style */
        a {
            color: #f7f5f0;
            text-decoration: none;
            font-weight: bold;
            display: block;
            margin: 15px 0;
        }

        a:hover {
            color: #3b82f6;
            text-decoration: underline;
        }
    </style>
</head>
<body>

    <div class="container">
        <h1>Mental Health Resources</h1>
        <p>Explore resources below:</p>
        <div id="mentalHealthLinks">
            <!-- Links from JSON will load here -->
        </div>
    </div>

    <script>
        async function loadMentalHealthLinks() {
            try {
                const response = await fetch('https://platinumit-mental-health-links-test.s3.us-east-2.amazonaws.com/mental_health_links_test.json');
                if (!response.ok) throw new Error('Network response was not ok');

                const data = await response.json();
                const container = document.getElementById('mentalHealthLinks');

                data.forEach(item => {
                    const link = document.createElement('a');
                    link.href = item.link;
                    link.textContent = item.title;
                    link.target = '_blank';
                    container.appendChild(link);
                });
            } catch (error) {
                console.error('Failed to fetch resources:', error);
                document.getElementById('mentalHealthLinks').textContent = 'Unable to load resources.';
            }
        }

        window.onload = loadMentalHealthLinks;
    </script>
</body>
</html>
When visiting the webpage, it retrieves JSON data from the AWS S3 bucket to dynamically enhance the page content.

Ideally following this implementation, cybersecurity is also a factor to consider. Cross-Origin Resource Sharing, or CORS, is one area where enhanced security could be focused on by changing the AllowedOrigins to a more restrictive setting, i.e., www.cyberhands.tech, as an example, but was determined to be out of bounds of this blog post.
In the end, there are obviously numerous ways of implementing the solution defined herein, but the overall goal was to implement the defined technologies: Python, AWS Lambda, AWS S3, AWS EventBridge, and HTML to deliver a new Cloud Networking and Infrastructure Solution to enhance webpage content. Being in IT or Cybersecurity requires detailed knowledge in tying information systems, sometime disparate information systems, together using various methodologies. Python, a high-level, interpreted programming language, is crucial in web development, network security, and automation. AWS as a Cloud Service Provider, further extends IT infrastructure in scalability, security, and flexibility, enabling businesses to deploy, manage, and optimize applications and services globally, which all require enhanced security.
Exploring these web technologies is a rewarding process, combining practical skills with impactful applications. What began as website development quickly grew into a dynamic platform that shares mental health resources and integrates critical elements of web, cloud, and cybersecurity knowledge. By tying together HTML, CSS, JS, Python, and AWS services, cyberhands.tech has become more than a technical exercise; it’s a testament to how thoughtfully implemented technology can support important topics and enrich online resources. Looking back, this project not only reflects the journey toward certifications and skills but also the meaningful intersections between tech expertise and mental health advocacy.