Hardening Windows Installations - Security Baselines - Part 3
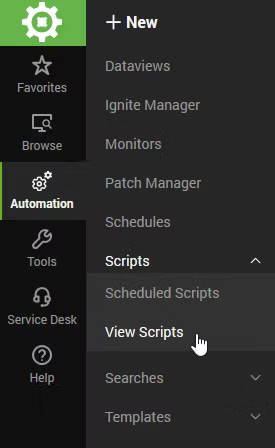
Now that the preliminary tools are staged, in the interest of creating and showing a complete process, this guide will attempt to show from beginning to end the Script step creation. Within the ConnectWise Automate utility in Automation, Scheduled Scripts, View Scripts is the Scripts location of Automate.
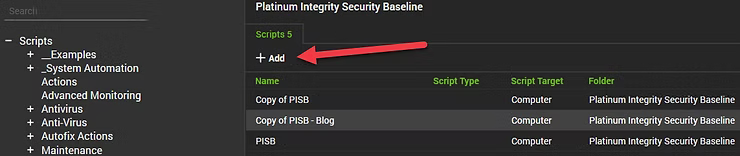
In short, on the left hand side is a simplified Scripts folder that by default only allows one folder depth of creation, meaning you cannot nest sub-folders. On the right hand side is the actual folder location where the script will go, as the screenshot shows, by clicking "Add".
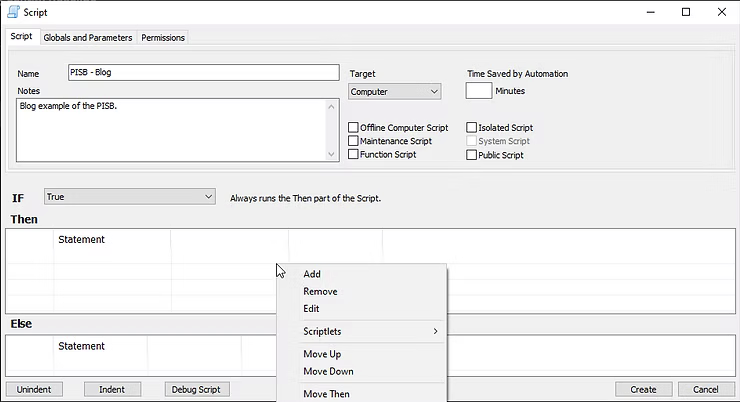
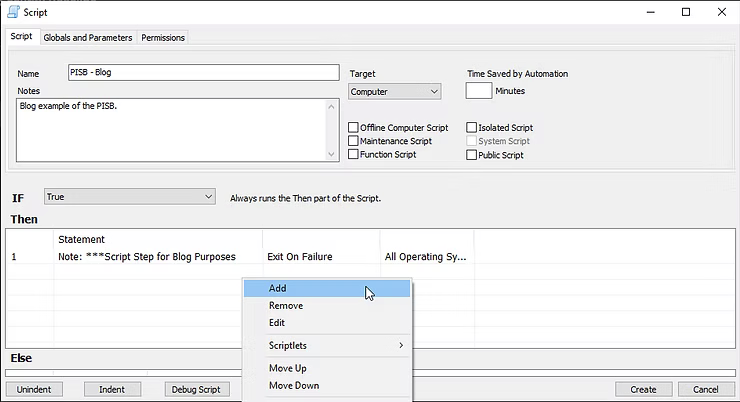
Adding a script will bring up the Script configuration windows where Name, Notes, and the IF/THEN Statements can be configured. As can be seen below, the Name and Notes section are configured, while an example of a right-click context sub-menu was enabled to highlight another "Add" option to select.
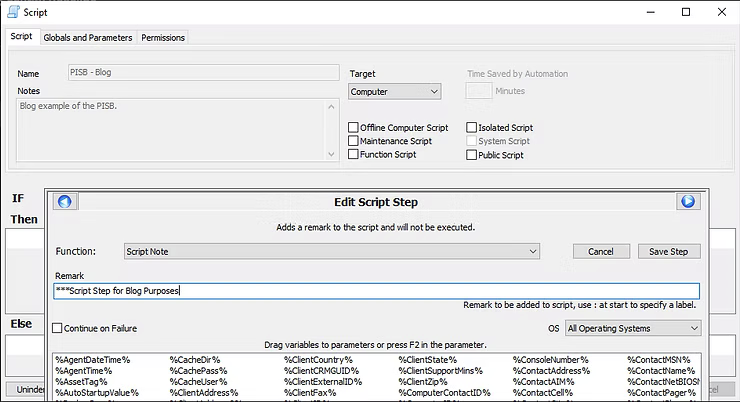
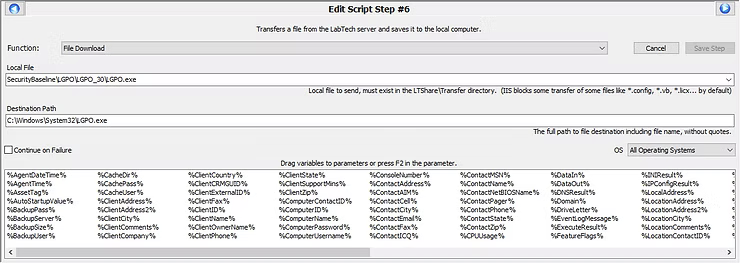
Once the Add sub-menu context is selected, the "Edit Script Step" option appears where the Function Script Note and Remark are displayed. For the purposes of this blog post, the screenshot below shows the entered data to move this guide forward, which can then be saved to Automate by selecting the "Save Step" button.
Once the Script step has been saved, the Edit Script Step closes and returns the user to the main Script configuration where right-clicking can adding a new script step for the next step.
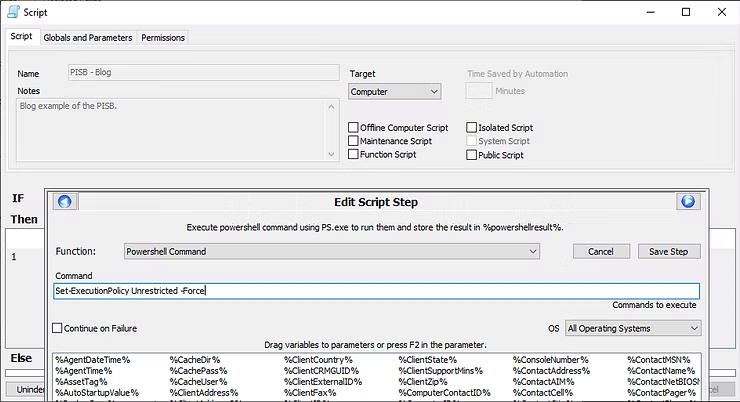
ConnectWise Automate is an individual script step creation tool, which is a powerful administrative tool. With a new Script step added, the Function for the next Script step is Powershell Command, while the specific command is Set-ExecutionPolicy Unrestricted -Force as denoted in the screenshot below. In this instance, this is an assumption the execution policy, which is a security restriction on Microsoft Windows end devices, is set to restricted to protect from various scripts. The step will enable it for further iterations of Powershell commands to be run later on in the scripting process.
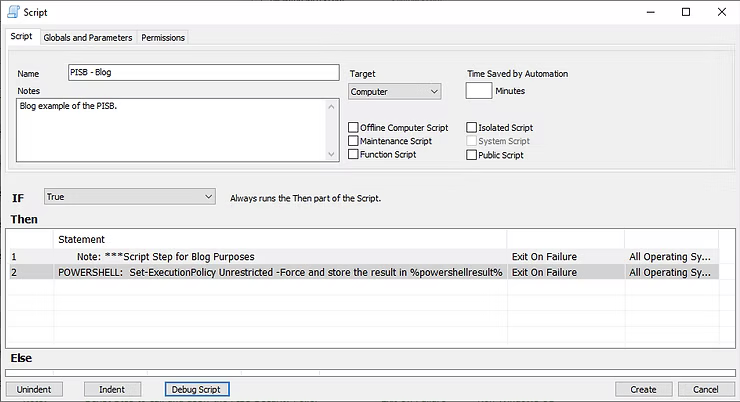
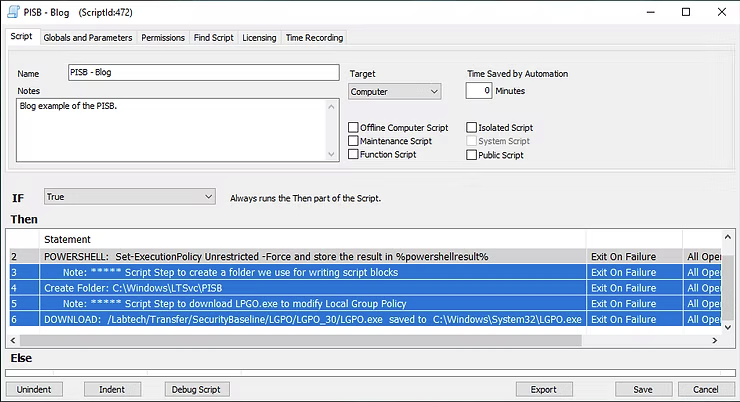
With these two steps created, the screenshot below highlights the creation of the beginning steps of the initial Script for further steps that will be added later on.
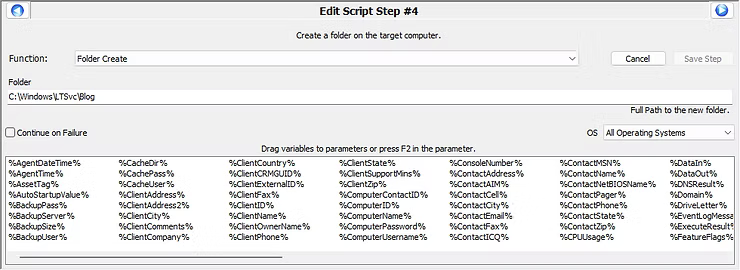
With an initial understanding now gained of the Script step creation process, the functions in the following screenshot of Create Folder and File Download will provide the next steps.
The script function Create Folder to C:\Windows\LTSvc\Blog will create a folder in the Automate agent directory for further downloads. Basically a staging area for downloads from the WebDAV folder provided by ConnectWise for download and execution to achieve further Windows hardening of the OS.
The script function File Download will involve a Local File, which will be from the staging WebDAV repository downloads will occur from, to a Destination Path. The Local File on the staging WebDAV repository will be SecurityBaseline\LGPO\LGPO_30\LGPO.exe, which is the file being downloaded, to the Destination Path of C:\Windows\System32\LGPO.exe, so the Local Group Policy Object of the local Windows end device can be modified.
Now, at this point of the guide the individual reading this to learn is realizing there is nothing to download since it has not been staged. That realization is correct. Git or wget are also commands that could have been implemented to facilitate this process so the staging of files is outside of the ConnectWise WebDAV repository. In a further blog post, the process may be re-written to implement from a GitHub strategy perspective, but in the first iteration of this security baseline, ConnectWise Automate was the tool at hand, so to document it, this blog was decided to be written to re-learn how it was first developed.
The next installment the guide will circle back to how the Microsoft Security Compliance Toolkit will start wrapping up into a cohesive process to deliver the security baseline.